
Tetragon Fortress 2 Guide: Getting started
About
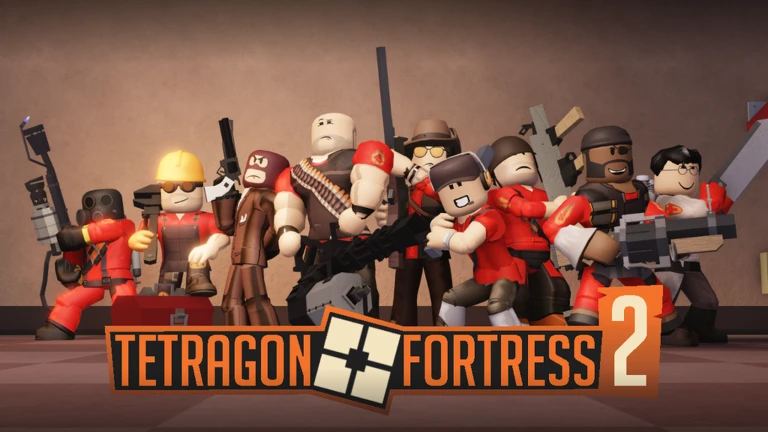
OverviewTetragon Fortress 2 is a Roblox fan recreation of Team Fortress 2 where two teams — RED and BLU — battle across a variety of maps and game modes. You pick one of nine classes, each with its own weapons and role, and work with your team to complete the objective. This guide covers how to get started, how each class fits into a team, and how to find the secret badges scattered around the maps.
What is on this page
Contents
Getting started
Step
When you first join, you are given stock weapons for whichever class you pick. Every unlockable weapon currently in the game is also handed to you automatically at no cost, so you can experiment with any loadout from the very first session. Each class can hold a primary weapon, a secondary weapon, and a melee weapon; the Engineer and Spy also have PDA slots on top of those three.
- Pick a team Choose RED or BLU from the team selection screen before you spawn.
- Pick a class Select one of the nine classes; note that each team allows a maximum of three players per class at the same time.
MetaNew Player Survey

The next survey is being prepared.
The nine classes and what they do
Table
All nine classes fall into three groups. Offensive classes push forward and take objectives, defensive classes hold areas with heavy firepower, and support classes keep teammates alive or remove key threats. No single class can do everything, so team composition matters.
| Scout (Offensive) | Fastest class in the game with a double jump; captures points and pushes payload carts at twice the normal speed. |
| Soldier (Offensive) | Fires rockets with splash damage and can rocket jump to reach the front line or attack from unexpected angles. |
| Pyro (Offensive) | Flanks and ambushes enemies with the flamethrower, applies afterburn, airblasts projectiles back, and can expose cloaked Spies by setting them on fire. |
| Demoman (Defensive) | Plants sticky bombs as traps and lobs grenades to control choke points from a distance. |
| Heavy (Defensive) | Highest health pool in the game, deals sustained minigun damage, but moves the slowest. |
| Engineer (Defensive) | Builds sentry guns to defend areas, dispensers to restore teammates' health and ammo, and teleporters to move allies across the map quickly. |
| Medic (Support) | Heals and overheals teammates; builds up Ubercharge, which makes both the Medic and their patient invincible for eight seconds when activated. |
| Sniper (Support) | Picks off high-value targets from long range and scores critical hits with headshots; weaker in close-quarters. |
| Spy (Support) | Uses the Invisibility Watch to go invisible, disguises as enemies, backstabs unaware opponents for an instant kill, and destroys Engineer buildings with a Sapper. |
Tips for playing Scout
Tips
Scout has only 125 health, rising to 185 with an overheal, which is among the lowest in the game. His strength is speed and a double jump, not raw durability, so you need to move smart and pick your fights carefully.
- Strafe left and right in unpredictable patterns while moving so enemies have a harder time landing shots on you.
- Never fight a Heavy from the front — his minigun puts out too many bullets to dodge and his health pool is too large; hit him from behind while he is focused on a teammate.
- Leave teleporters for slower classes; your speed makes them less necessary for you than for a Heavy or Engineer.
- Stick to one-on-one fights — taking on multiple enemies at once puts you at a serious disadvantage given your low health.
- Memorize where health kits are on each map so you can grab one the moment you take damage.
- Save your bat for finishing off enemies who are nearly dead or for when your guns are empty; its damage output alone is not enough to rely on.
Game modes across the map pool
SummaryEach map is tied to one game mode. On Payload and Attack/Defense, teams swap sides after the first round so both sides get a turn attacking and defending.
- King of the Hill Both teams fight to hold a single central point; examples include Boston, Hill Mine, and Acid Valley.
- Capture the Flag Each team must steal the enemy's intelligence and return it to their own base; Minefort and Revelation are in this pool.
- Payload The attacking team pushes a cart to the end of the track while defenders try to stop it; Death Canyon and Coaltown are examples.
- Control Points Teams compete to capture and hold multiple points across the map; Chaos Carnival and Red Mesa are in this rotation.
- Attack/Defense One team attacks a set of points while the other defends; Uranium and Ghostland are examples.
- VS Bosses One player is randomly chosen to play as a powerful boss while everyone else works together to bring them down; access it through the server tab in the menu.
How to find the hidden badges
Step
Badges are awarded for finding easter eggs hidden around the maps or for doing specific things in the game. The directions below cover the ones that have confirmed steps.
- Those Left 4 Dead Go to the BLU team's second base, follow the river that starts from a waterfall, walk up to the tree at the end, and touch it.
- The Forgotten Play on the standard version of Minefort (not the pro variant), go into the underground tunnels in the RED base, and push on a specific section of the wall to open a hidden room.
- Drifting Deception On the Fish Box map, go to the dock near the back of the fish box store, then blast jump across to the small burning boat; walk around inside it if the badge does not appear immediately.
- Sing for the Year Play on the Vulkan map and earn the badge there.
- Big Donation Purchase a donation gamepass from the in-game shop.
- Sigma (Gilded Grillin') Obtain the Golden Frying Pan to receive this badge.
Weapons: stock versus unlocks
Tips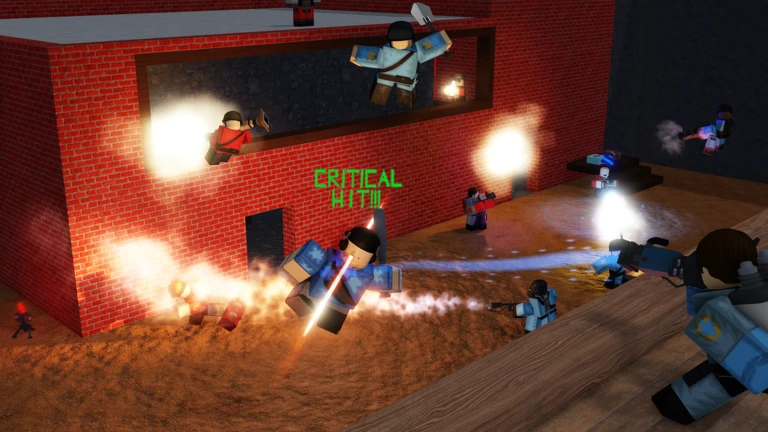
Stock weapons have no downsides but no special advantages either. Unlocked weapons come with both a benefit and a drawback, which rewards players who build their playstyle around them. New weapons can drop randomly during play or be bought from the shop.
- Every class starts with stock weapons in all three slots; the Engineer and Spy also have PDA slots for tools like the Construction PDA, Sapper, and Invisibility Watch.
- The Frontier Justice is an Engineer primary that stores critical hits every time your sentry gun gets a kill — two crits per kill, one per assist — and releases them all when the sentry is destroyed; you lose all stored crits if you die before using them.
- Some weapons, such as the Rocket Jumper for Soldier and the Sticky Jumper for Demoman, deal no damage but are built around mobility rather than combat.
- The Pyro's Homewrecker lets you destroy Sappers placed on friendly Engineer buildings.
- A few all-class melee weapons — the Golden Frying Pan, Necro Smasher, and Conscientious Objector — can be equipped by any of the nine classes.
- Item quality tells you where a weapon came from: Normal means stock, Unique means a drop or shop purchase, Strange means it has been used with a Strangifier, and Nameable means it can be renamed with a Nametag.
Countering the Spy
WarnThe Spy can disguise as any player on the enemy team and go fully invisible using the Invisibility Watch, making them hard to spot by sight alone.
Community strategy ideas
CommunityThese ideas and tips come from people playing the game. Share your discoveries too!
No strategy ideas yet. Share a tip you discovered.
Share a strategy idea
Tetragon Fortress 2
Glossary
Glossary- Ubercharge
- A Medic ability that activates after healing enough health, making both the Medic and their current patient completely invincible for eight seconds.
- Backstab
- A Spy melee attack landed on an enemy's back that kills the target instantly regardless of their health.
- Sentry Gun
- An automatic turret built by the Engineer that attacks any enemy who comes within its range.
- Dispenser
- An Engineer building that continuously restores the health and ammo of nearby teammates.
- Invisibility Watch
- A Spy PDA tool that temporarily makes the Spy invisible, allowing them to sneak past enemies.
- Rocket Jump
- A movement technique where the Soldier fires a rocket at the ground beneath themselves to launch high into the air using the explosion's knockback.
- Afterburn
- A damage-over-time effect applied to enemies hit by the Pyro's flamethrower that continues to deal damage for a short period after they leave the flames.
- Sapper
- A device the Spy attaches to enemy Engineer buildings that continuously damages them until removed.
- Stock weapon
- The default weapon a class starts with; it has no special advantages or disadvantages.
- Revenge Crits
- Critical hits stored by the Frontier Justice each time the Engineer's sentry gun gets a kill, released for use once the sentry is destroyed.
Common questions
FAQDo I need to spend Robux to get weapons?
No. Every unlockable weapon currently in the game is given to you for free the moment you join. You can try any loadout combination straight away without spending anything.
Can more than three people on my team play the same class?
No. Each class is capped at three players per team at the same time. If your chosen class is already full, you will need to pick a different one until a slot opens up.
How do I beat a Heavy as Scout?
Fighting a Heavy face-to-face as Scout is a losing trade every time — his minigun output and health pool are both too high. Wait until he is busy shooting at a teammate, then hit him from behind with close-range Scattergun shots. If he turns around before he is low on health, disengage and come back for another attempt.
What is the difference between Payload and Attack/Defense?
In Payload, the attacking team pushes a cart along a track toward the enemy base while defenders try to hold it back. In Attack/Defense, the attacking team must capture a series of fixed points while the defending team holds them. Both modes run two rounds and then swap which team attacks.
What does the Frontier Justice do differently from a regular Shotgun?
The Frontier Justice holds half the ammo of a stock Shotgun but earns critical hits from your sentry gun's kills — two crits per kill and one per assist. Those crits are only available after your sentry is destroyed, so you need to survive long enough to spend them or they are wasted on death.
Game updates can change what is on this page. If you spot something, get in touch and let us know.