Games listed 41,809
Game guide

Fisch Guide: How the fishing minigame works

Fisch 🐟 [FREE GIFT]
Fisching, Playing 90K, Rating 90.8%
Creator Fisching
Playing 90K
Rating 90.8%
Is this game fun?
No votes yet. Cast the first one.

About

Overview

Fisch is a fishing adventure on Roblox where you cast a line, catch fish with over 400,000 possible variations, and explore a growing world of islands. This guide covers the fishing minigame, how to spend your early currency, which rods to target, and systems like baits, crab pots, challenges, and the Appraiser that will quietly speed up your progress.

What is on this page

Contents
01

How the fishing minigame works

Step
In short The catch comes down to two back-to-back inputs: the shake prompts, then keeping the white bar on the fish indicator.

Every catch follows the same two-stage sequence. First, cast your bobber and wait for a bite — clicking the shake button multiple times as it moves around your screen shortens how long you wait. Once a fish bites, the movement minigame begins. Rarer fish put up more resistance, so learn the rhythm on common fish before chasing anything unusual. A perfect catch gives you 50% more XP and a small C$ bonus.

  1. Cast hold down to send your bobber into the water; a bar next to your character shows cast strength, from Meh all the way up to PERFECT.
  2. Hold to move right, release to move left this controls the white bar during the movement minigame.
  3. Keep the white bar on the fish indicator it is fine to drift off briefly, but stay close as much as possible.
  4. Fill the progress bar once it is full, you reel in your catch; if it empties completely, your line snaps and you lose the fish.
Ask on the board
02

First steps after spawning

Check
In short Practice casting near the Moosewood dock and sell your first few fish to the Merchant before doing anything else.

You start at Moosewood every time. The fish near the dock put up weak resistance, which makes them the best place to get comfortable with the movement bar. Talk to Pierre, the NPC who walks you through catching, and then find the Merchant to sell what you caught. Currency here is measured in C$.

  • Pick up the Flimsy Rod from the Merchant and practice near the Moosewood dock.
  • Talk to Pierre he walks you through catching three fish and then nudges you toward buying your first real rod.
  • Sell your fish to the Merchant each fish's price depends on its rarity, weight, and any mutations it carries.
  • Right-click a fish in your inventory on PC to favourite it, which protects it from the Sell Inventory button.
  • Check for bait crates from the Merchant if you want a small stat boost, but saving for rods and a boat is more important early on.
03 Live and upcoming events Events

Events running now or coming soon. They have fixed dates, so check them first.

Live now –

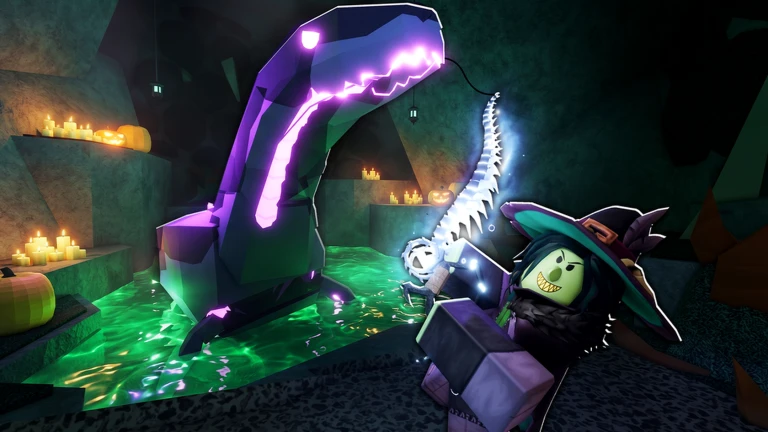
FischFright 3

Fisch's annual limited Halloween event is coming back for its third time, and it's going to be bigger and spookier than…

See the whole schedule
04

Rod upgrade path from start to endgame

Table
In short Skip the middle rods and aim straight for the Carbon Rod as your first real upgrade, then follow the progression all the way to Kraken Rod or Wingripper.

The Flimsy Rod is only a starting tool. The Plastic Rod and Lucky Rod sit between it and the Carbon Rod, but the performance gap between them is small enough that saving past both is faster overall. After the Carbon Rod, each major upgrade opens a new tier of fish.

Flimsy Rodstarter tool; treat it as practice gear and replace it as soon as possible.
Carbon Rod (2,000 C$)first real target; luck goes up 25%, noticeably improving rare catches.
Fungal Rodobtainable through a quest in Mushgrove Swamp; stabilises early luck without the C$ cost.
Steady Rod (7,000 C$)the mid-game foothold after Carbon Rod.
Trident Rod (150,000 C$, Trident's Temple)passive Atlantean Mutation gives a chance to triple a fish's value.
Kraken Rod (1,333,333 C$, Atlantis)185% luck and a chance of guaranteed legendary drops.
Wingripper (Underground Music Venue quest)endgame rod with especially strong performance at night.
05

Exploring islands with your first boat

Step
In short Buy the Rowboat at level 5 and head west to Roslit Bay as your first destination — the fish there are better than anything at Moosewood.

Once you reach level 5 you can buy your first boat. Different islands hold different fish, so your boat is not just transport — it directly expands what you can catch. Spawn the boat from My Ships. Each spawn carries a cost unless you own the permanent spawn game pass, so avoid spawning it when you do not need it.

  1. Reach level 5 then talk to the shipwright at the Moosewood dock to buy the Rowboat.
  2. Spawn it from My Ships and board with the interact key.
  3. Head west to Roslit Bay better fish and better early income than Moosewood.
  4. Pick up the GPS for 100 C$ and the Fish Radar for 8,000 C$ when you can afford them both make exploring much easier.
  5. Keep an eye out for sunken chests that spawn around the map they can hand over hundreds to thousands of C$ and occasionally the Auric Rod.
  6. Mid-game destinations include Forsaken Shores to the south-west and Snowcap Island to the far east.
06

Baits and crab pots for passive income

Tips
In short Equip a bait every session and drop a few crab pots before you start fishing so both income streams run at the same time.

Baits affect four stats: resilience slows the fish's movement on the bar, control widens your white bar, lure speed shortens the wait before a fish bites, and luck raises your chance of rare catches. There are two kinds of luck — general luck from rods, and specific luck from baits, which raises the odds of catching whichever fish prefers that bait. Crab pots are a separate passive system: place them, keep fishing, then collect crabs and sand dollars when you come back.

Tips worth knowing
  • Bait crates cost 120 C$ each from the Merchant and contain random baits.
  • Higher resilience means the fish moves more slowly across the bar — useful for any fish that gives you trouble.
  • Higher control means your white bar is physically wider, making it easier to stay on the indicator; zero control gives a bar that is 30% of the total width.
  • Specific-luck baits raise the catch rate only for the fish that prefer them — check the Bestiary before equipping.
  • Set out three or four crab pots near Moosewood's rocky beach before a session and collect them when you are done.
  • The Appraiser NPC can re-evaluate a fish to change its selling price and attributes, but cannot remove a Shiny or Sparkling tag once a fish has one.
07

Challenges for XP and rare rewards

Summary
In short Talk to the Challenges NPC in Moosewood every day — completing all nine challenges resets the grid so you can run it again.

The Challenges NPC in Moosewood offers nine quests at a time. Finishing them all grants up to seven rewards drawn from a shared pool, and the grid resets afterward so you can keep earning. You get one free skip every 24 hours, which is worth saving for whichever challenge looks hardest.

  • Location speak to the Challenges NPC at Moosewood to open the quest grid.
  • Reward pool includes 50,000–100,000 XP (25% chance), 15–25 Luminous Larva (25%), Glitched Potion (20%), Blue Moon Totem (10%), Exalted Relics (15%), and Coral Skin Crate (5%).
  • Free skip one per 24 hours at no cost; paying 29 Robux skips any challenge instantly.
  • Reset completing all nine challenges restarts the grid so you can repeat the cycle.
08

Mutations, Shiny fish, and protecting valuable catches

Tips
In short Sparkling and Shiny fish are worth keeping until you are ready to sell deliberately — use the favourite system so you do not lose them by accident.

Every fish has a small chance to be Shiny, meaning it carries an alternative colour. Sparkling fish are a separate distinction and sell for 90% more than a standard copy of the same fish. When a fish's weight is above its average catch weight, the weight shown in your inventory turns yellow. These details affect how much money a fish is actually worth, so it pays to glance at them before selling.

Tips worth knowing
  • Any fish can be Shiny — all fish have a small chance of spawning with an alternative colourway.
  • Sparkling fish sell for 90% more than a normal version of the same fish.
  • A yellow weight number in your inventory means the fish is heavier than average, which affects its price.
  • Right-click a fish on PC to favourite it; favourited fish are skipped when you press Sell Inventory.
  • The Appraiser can change a fish's attributes, but she cannot strip the Shiny or Sparkling tag from it.
  • Receiving a fish from another player unlocks its Bestiary entry, but the catch percentage only rises when you catch it yourself.
09

Redeem codes

Summary
In short There are currently eight working codes tracked for this game — enter them in the in-game menu as soon as you find them.

Codes were added in version 1.02.1 and can be entered through the in-game menu. Rewards include C$, skins, boats, baits, and bobbers. Each code works once per account and some have expiry dates, so entering one the moment you find it is the safest approach. This page automatically lists the current working codes — the codes themselves are not printed here, only the entry instructions below.
  • Entry point open the in-game menu and scroll to the bottom to find the code input field.
  • Uses one per account; the same code cannot be entered twice on the same account.
  • Expiry codes have deadlines, so act on them quickly rather than saving them for later.
  • Current count eight working codes are being tracked for this game as of October 24, 2026.
10 Working codes Codes
ThanksFor5B
FischFright2026
SaveNate
spookyomoji Omoji Skelecat Lantern、Kittyyy Bobber
Omoji Skelecat Lantern、Kittyyy Bobber
Every code, and the votes on it, are on the codes page

Glossary

Glossary
Flimsy Rod
The starter fishing rod available from the Merchant at Moosewood; useful only for learning the controls.
Movement bar
The white bar that appears once a fish bites — keep it aligned with the fish indicator to fill the progress bar and complete the catch.
Shake button
A button that appears in a random spot on screen after casting; clicking it multiple times shortens the time before a fish bites.
Resilience
A rod or bait stat that slows the fish's movement across the bar, making it easier to keep the white bar on target.
Control
A stat that changes the physical width of the white bar — zero control gives a bar that is 30% of the total width, and it scales from there.
Lure speed
A stat that reduces how long you wait between casting and getting a bite; at 100% or above, a fish bites the moment your bobber touches the water.
Luck
General luck raises the overall chance of rare catches; specific luck, found only on baits, boosts the odds of catching whichever fish prefers that bait.
Shiny
A rare variant of any fish that displays an alternative colour scheme.
Sparkling
A fish distinction separate from Shiny that increases the fish's sell value by 90%.
Mutation
A special property a fish can carry that can multiply its sell value significantly.
Merchant
An NPC found on various islands who buys your fish for C$, the in-game currency.
Appraiser
An NPC who re-evaluates a fish's attributes and selling price for a fee, but cannot remove Shiny or Sparkling tags.
Bestiary
An in-game catalogue that records fish you have caught and shows details like preferred baits; completion percentage only rises when you catch a fish yourself.
Crab pot
A passive item you place in the water that collects crabs and sand dollars automatically while you fish.
C$
The currency used in Fisch for buying rods, boats, baits, and other items.
Keeperbound
An enchanting state applied to a rod at the Keepers Altar using Sovereign Relics; a Keeperbound rod gains powerful effects but drains with use and must be repowered.
Sovereign Relic
A rare relic obtainable while fishing anywhere, with boosted drop rates during Sovereign Weather events; required to begin a Keeper's Ritual at the Keepers Altar.
Companion
A creature that follows you while you fish, has its own personality and abilities, and levels up to level 10 by fishing alongside you.

Common questions

FAQ

I keep losing the fish during the movement bar. What should I do?

Head back to the Moosewood dock and practice on the weaker fish there, since their resistance is lower and gives you more time to react. Focus on the hold-to-go-right, release-to-go-left rhythm until it feels automatic. If you are still struggling, the game suggests picking up the Training Rod to build your control before moving on to harder locations.

How do I stop myself from accidentally selling a rare fish?

On PC, right-click any fish in your inventory to favourite it, and it will be skipped whenever you press Sell Inventory. Make a habit of doing this immediately after catching anything unusual.

How do I reach other islands?

Once you hit level 5, buy the Rowboat from the shipwright at the Moosewood dock, then spawn it from My Ships. Roslit Bay to the west is the best first destination. Further islands like Forsaken Shores and Snowcap Island become worthwhile once your rod and skills are stronger.

Do I need to spend real money to enjoy the game?

No — all the main content, including every fish, island, and rod upgrade, is available without spending real money. The optional paid item most worth knowing about is a game pass that removes the per-spawn cost on your boat, which is a convenience but not a necessity. There is also a 2x EXP game pass for 199 Robux if you want to level faster.

How do I earn XP quickly?

Fishing is the main source of XP, and landing a perfect catch gives you 50% more XP than a normal one. Opening treasure chests grants around 1,500–2,000 XP each, and completing a Bestiary section for an area gives 2,000–2,500 XP. Completing Challenges from the Moosewood NPC can also reward between 50,000 and 100,000 XP in a single go.

Updated Oct 24, 2026
Game updates can change what is on this page. If you spot something, get in touch and let us know.
Fisch 🐟 [FREE GIFT] Fisching, Playing 90K, Rating 90.8%
See the game pageSee working codesAsk on the board
Add it to your home screen and it works like an app. One tap to open, and it loads faster after that.