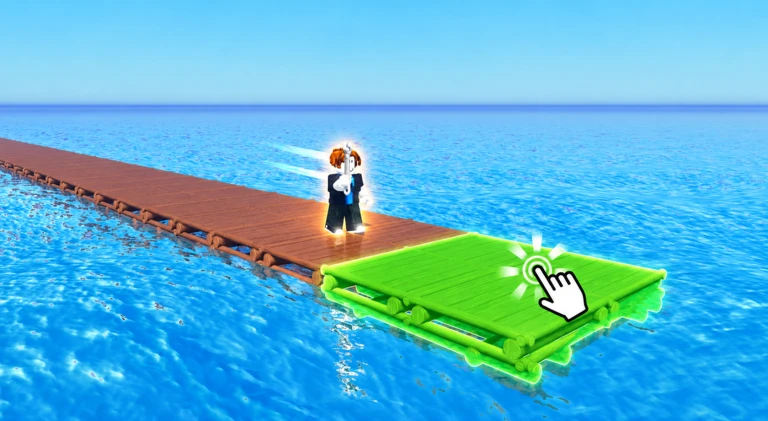
100 Days at Sea is an open-world survival game on Roblox where you are dropped in the middle of the ocean and must survive for 100 days. You build a raft, gather resources with a harpoon, explore mysterious islands, and uncover the secrets of the Bermuda Triangle. This guide covers everything from your first minutes on the water to handling tough enemies, choosing a class, and working toward every badge.
In shortYour only goal at the start is to survive one night, so focus on nearby resources and a basic raft platform before anything else.
When you load in, read the tutorial and on-screen instructions first — they explain how to collect resources and build your raft. Driftwood, timber, crates, and scrap float near you from the beginning, and pulling them in with the harpoon is safer than swimming out for them. Food and water are more urgent than weapons or exploration at this stage. Make sure you are back on the raft before dark.
Read the tutorialwork through the on-screen guidance to learn movement and basic controls.
Use the harpoonpull nearby driftwood, timber, and scrap toward you without leaving the raft.
Build a platformlay down raft flooring as your base before adding anything else.
Secure food and waterprioritize these over crafting tools or decorations.
Return before nightfallget back to the raft and check your defenses before it gets dark.
In shortSplitting your time so that daytime is for gathering and nighttime is for defending makes the days stack up much more smoothly.
Daytime is your window for harpoon runs, crafting, and island trips. As evening comes, switch focus to eating, restoring health, and checking your weapons. Once it is dark, enemies are more dangerous and the risk of getting lost away from the raft goes up sharply, so staying put and holding the raft is the smarter call.
Tips worth knowing
Use daylight hours to gather resources with the harpoon and finish any crafting you need.
Before sunset, eat, check your health, and count your remaining weapons.
At night, focus on defending the raft and note any damage to repair in the morning.
Avoid swimming or sailing to distant islands after dark — the risk of enemy encounters and getting lost is much higher.
Start each morning by repairing any defenses that took damage overnight before you do anything else.
03Live and upcoming eventsEvents
Events running now or coming soon. They have fixed dates, so check them first.
Live now –
HALLOWEEN EVENT
Unlock Exclusive Classes, Pets and Decorations for this Halloween Season!

Upcoming –
PRO SERVERS!
Play with more experienced players in our new Pro Servers, exclusive for users who reach 100 Days or more.
In shortA compact raft with supplies in the centre and walls on the outside is easier to defend than a sprawling one.
Every extra platform you add is another place an enemy can enter at night, so expand gradually and always add defenses to the outer edge before you grow further. Keeping your cooking station, storage, and workbench in the middle of the raft keeps them away from the edges where enemies hit first. Clear walkways matter too — if the raft is cluttered with loose materials, moving quickly during a fight becomes difficult.
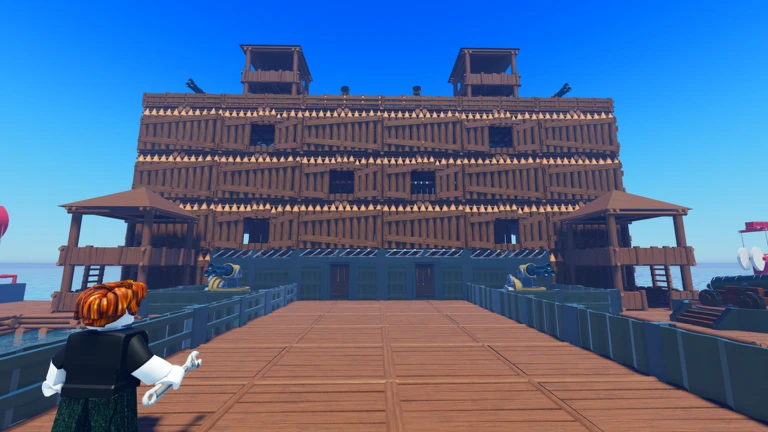
Storage, cooking, and workbench are placed in the centre of the raft, away from the outer edge.
Walls and defensive structures cover the full outer perimeter before you expand the platform further.
Defensive equipment is concentrated near entry points to slow enemies down.
At least one clear walkway runs across the raft so you can move during combat.
Loose materials are put into storage rather than left on the floor of the raft.
In shortGo in fully stocked and know your way back, because running out of supplies or getting lost mid-island is how most runs fall apart.
Islands hold food, materials, chests, and rare items — but they also have more enemies than the open water. Checking your food, healing items, and weapons before you land is not optional. When you first arrive at an island, hang back near the entrance and watch how enemies move before engaging. Visiting every island within a single session earns the Magellan badge, so keeping track of which islands you have already hit makes that goal much easier to reach.
Worth watching out for
Land with full food, weapons, and healing items before you go.
Observe enemy movement near the island entrance before committing to a fight.
Use walls and natural obstacles to control the direction enemies approach from.
Head back to the raft the moment your inventory is full or your health drops low.
Always keep the direction back to your raft in mind so you can leave before you get turned around.
Track which islands you have visited if you are going for the Magellan badgeit requires all of them in one session.
06
Badge milestones worth planning around
Tips
In shortTreating badges as short-term targets gives you a clear path from day one all the way to day 100.
There are 25 badges in total, and their unlock conditions map directly onto what you should be doing anyway. Survival badges step up at days 1, 5, 10, 20, 30, 40, 50, 60, 70, 80, 90, and 100, so each stretch has a concrete finish line. Running the cooking pot and levelling the bonfire alongside your survival run means you collect most of the remaining badges without making extra trips.
Tips worth knowing
Survive day 1 to earn Just Getting Started — treat it as your very first target.
Cook chowder in the cooking pot to unlock the We Cookin badge.
Level up the bonfire repeatedly; each new level unlocks the next Bonfire badge in the series.
Burning 1,500 items in a single session earns Bonfire 8, so save bulk burning for a dedicated run.
Reaching max bonfire level with four or more people unlocks Bonfire 9 — coordinate this with your group.
Survive all 100 days to earn the final badge, Rescued!
07
What to check when you are stuck
Table
In shortMost dead ends come down to the same two problems — weak weapons and running low on food or water — so check those before anything else.
Sometimes the best move is to retreat to the raft, resupply, and try a different island first to pick up better gear.
Weapon match
check that the weapon you are using is effective against this enemy type.
Food and water
confirm your gauges are not draining health while you fight.
Wall and turret count
assess whether your defenses are slowing enemy entry enough.
Drop item collection
verify you are picking up items from defeated enemies to upgrade your kit.
Exploration order
consider whether clearing a different island first would give you better weapons and materials.
08
Classes and Pearls
Tips
In shortFigure out what is actually giving you trouble before you spend Pearls, and lean toward survival or healing classes while you are still learning the game.
As you progress, you can spend Pearls to unlock a class. Each class changes the tools and abilities you start with, so the choice has a real impact. If you are playing with friends, spreading across different classes so each person has a different role makes the group significantly more efficient.
Tips worth knowing
Read every class description before spending Pearls.
Survival and healing classes are the safest pick when you are still learning the game.
Movement-focused classes suit players who travel between islands frequently.
Support classes pay off most when you are in a full group.
In a group, avoid stacking the same class — split roles so cooking, repairs, combat, and gathering are each covered.
09
Redeem codes
Step
In shortCodes expire, so enter any code you find right away using the in-game input field.
Developers release codes periodically that give items such as food and building materials. Each code can only be used once per account, and many have expiry dates. The input field is in the main menu or the pause screen. This site currently tracks working codes — you can find them in the codes section of this page.
Open the input fieldfind it in the main menu or the pause screen.
Claim immediatelycodes with expiry dates stop working without warning.
Check for an error messageif a code comes back as already used, it has been redeemed on your account before.
In shortThe full story and all core gameplay are completely free, so there is no need to spend anything to finish the game.
Every part of the game — raft building, resource gathering, island exploration, and reaching the ending — is accessible without paying. Paid items centre on saving time or changing appearances, and none of them are required to complete the story. If you are thinking about purchasing anything, talk it over with a parent or guardian first.
Story completion free, no purchases required.
Paid items time-saving and cosmetic, not needed to finish the game.
Resource gathering fully achievable through harpoon use and raft expansion.
Purchase decisions discuss with a parent or guardian before buying anything.
Community strategy ideas
Community
These ideas and tips come from people playing the game. Share your discoveries too!
No strategy ideas yet. Share a tip you discovered.
Share a strategy idea
100 Days At Sea
Glossary
Glossary
Raft
Your floating base in the middle of the ocean, built from driftwood and timber and expandable as you collect more materials.
Harpoon
A tool that hooks floating resources and pulls them toward your raft so you can gather without swimming.
Crafting
Combining gathered materials at a workbench to produce tools, building pieces, and food.
Workbench
A station placed on your raft where you turn raw materials into usable items.
Defenses
Walls, turrets, and other structures placed around the outer edge of your raft to slow enemy entry.
Bermuda Triangle
The mysterious ocean setting of the game whose secrets are gradually revealed as you explore its islands.
Pearls
In-game currency used to unlock classes; spend them only after reading what each class does.
Class
A role that changes your starting tools and abilities, chosen once and suited to a particular playstyle.
Hunger gauge
A meter that falls when you go without food; if ignored, it begins draining your health.
Bonfire
A structure you level up over time; each new level unlocks the next Bonfire badge in the series, with the final level being the ultimate target.
Chowder
A dish cooked in the cooking pot; making it for the first time earns the We Cookin badge.
Common questions
FAQ
What should I do first when I start the game?
Read the tutorial, then use the harpoon to pull in the driftwood, timber, and scrap floating nearby. Build a basic raft platform and secure food and water before you think about exploring anything further away.
Can I play this alone, or do I need friends?
You can make solid progress on your own. Playing solo means you handle cooking, gathering, building, and defending all by yourself, so keep your early ambitions modest and avoid long trips away from the raft until you have a routine down.
Is it safe to go to an island at night?
Darkness makes enemies harder to spot and increases the chance of losing your way back to the raft. Stick to daytime island runs and use nights for defending and repairs.
What is the bonfire for?
Levelling it up unlocks Bonfire badges one by one, and reaching the maximum level with four or more players earns a special badge. It is one of the key progression tracks to run alongside your survival days.
Do I need to spend money to finish the game?
No. The full story is completable without any purchases. Paid items are focused on saving time or changing how things look, and none of them gate story progress. Always check with a parent or guardian before buying anything.
What do I do when a boss or tough enemy keeps defeating me?
Retreat to the raft and check your weapon type, food supplies, and defensive setup before trying again. Sometimes the best fix is to explore a different island first and come back with stronger gear.
Updated Oct 3, 2026
Game updates can change what is on this page. If you spot something, get in touch and let us know.