Build a +1 Obby Guide: The core loop
About
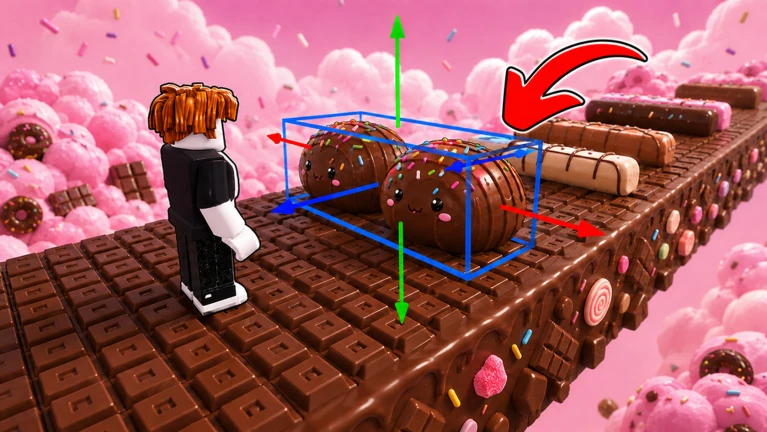
OverviewBuild a +1 Obby lets you design your own obstacle course, then earn money as other players run through it. You buy parts, place them at your base, collect the income they generate, and pour that money back into expanding the course.
What is on this page
Contents
Player notes and tips
Found a useful trick? Share it with everyone! Notes with screenshots are welcome!
Write a guide note
Build a +1 Obby
The core loop
Step
You start with a small amount of cash and a base to build on. Buying parts from the shop and placing them at your base creates the course and starts generating income. Once the course is up, other players can attempt it, and their runs earn you money you can spend on more parts. The four actions you cycle through are buying, placing, collecting, and test-running.
- Buy parts open the ASMR shop or the parts shop and spend your starting money.
- Place them arrange the parts on your building grid to form a course.
- Collect income walk into the collection zone to pick up the money your placed parts have earned.
- Test-run choose 'Play your own obby' and run the course yourself to check for problems.
- Reinvest take what you collected and buy the next set of parts to extend the course.
MetaNew Player Survey

The next survey is being prepared.
Completing the tutorial
StepThe tutorial walks you through the core actions in a set order. Follow the steps below and the completion notice will appear. Check prices in the game itself, since the displayed amounts are the current ones.
- Visit the ASMR shop buy the x1 Treadmill and the Chocolate Keyboard.
- Place both parts put them side by side on your building grid.
- Collect your earnings enter the collection zone to receive the money.
- Test-run the course select 'Play your own obby' and run what you have built.
- Return to building choose 'End obby' to go back to build mode.
- Finish up buy and place the Needle and the Small Floor from the parts shop, then confirm the completion prompt.
ASMR parts versus regular parts
TableThe ASMR shop sells parts like keyboards, treadmills, and soft objects — pieces with distinctive looks or movement. The parts shop sells basics such as small floors, platforms, and cylinders that are easier to chain together into a walkable path.
| ASMR parts | boost income more but their shapes can be harder to connect smoothly. |
| Regular parts | contribute less income individually but make it easy to build safe walkways and landing zones. |
| Recommended pattern | wide floor, ASMR part, wide floor, repeated along the route. |
Laying out your first course
TipsStart by running the parts straight out from the entrance before adding any height or angles. Small gaps between parts are the most common reason a test-run falls through the floor, so check for them constantly.
- Align the first parts with the entrance and keep them in a straight line.
- Keep the first few parts at the same height so there are no unexpected drops.
- Place a wide floor before and after any unusually shaped ASMR part.
- Test-run every two or three parts to catch gaps before they stack up.
- Add height changes and angles only after a flat, fully walkable version already works.
Placement controls
CheckOn PC, use WASD to move around the grid. On mobile, stop your character and tilt the camera to a top-down angle before placing each part — trying to place while moving causes pieces to land in the wrong spot. If a key stops responding, close and reopen the placement mode.
- Rotate a part with R or use the on-screen rotate button if R does not respond.
- Tilt a part with T.
- Raise or lower a part with Q and E if nothing happens, reopen placement mode.
- Confirm placement with left-click or C.
- On mobile, stop moving and use a top-down camera angle before each tap.
Test-running and fixing problems
StepChoosing 'Play your own obby' switches you from build mode to a live run of your course. Walk through the centre of each part — running past the edge without hitting the middle does not register, so your speed total and level will not go up. Note every spot that feels awkward, then choose 'End obby' to return to build mode and fix the width or position before collecting income and expanding further.
- Start the test-run check your total speed before you begin so you can see whether it rises.
- Hit each part through the centre skirting the side does not count as a valid pass.
- Remember problem spots keep them in mind so you can address them all at once.
- Return to building select 'End obby', then adjust the width or position of any part that caused trouble.
- Collect, then expand enter the collection zone after fixing problems, and use the income to add the next section.
Mistakes that drive players away
WarnTest your own course before you consider it finished.
Safety while playing
WarnKeep personal details out of chat entirely. If another player is making the game unpleasant, you can block them, report them, or simply leave the session. Avoid any external scripts or unknown tools that claim to build automatically — they can get your account banned or cause problems on your device. If a Robux purchase appears in the game, check the price and what it does with a parent or guardian before confirming.
Glossary
Glossary- Obby
- Short for obstacle course — a Roblox game mode where players jump, run, and dodge their way to a finish line.
- Regular parts
- Basic building pieces such as small floors, platforms, and cylinders, sold in the parts shop, that are easy to chain into a walkable path.
- Base
- The area assigned to your character where you place parts to build your obstacle course.
- Building grid
- The snapping system that lines parts up to fixed positions so they sit evenly when placed.
- Collection zone
- The area you walk into to receive the in-game money your placed parts have earned.
- Total speed
- A stat that goes up as you run through your own course and hit the centre of each part.
- Test-run
- Playing your own course before it is finished to check that every section is passable.
Common questions
FAQWhat should I do first?
Go to the ASMR shop and buy the x1 Treadmill and the Chocolate Keyboard, then place both on your grid. After that, enter the collection zone to pick up your earnings and test-run the course to move the tutorial forward.
I entered the collection zone but my money did not increase — why?
Make sure the parts you bought are actually placed on your building grid rather than still sitting in your inventory. Parts only earn money once they are on the grid, so place them first and then visit the collection zone.
My speed and level are not going up during a test-run.
Running past the side of a part without hitting its centre does not register. Walk through the middle of each part, and if a section still will not count, go back to build mode and widen or reposition it before trying again.
I cannot get parts to land where I want on mobile.
Stop your character completely and angle the camera so you are looking down from above before you tap to place. Trying to place while moving is the most common cause of parts landing in the wrong spot.
Do I need to spend real money to make progress?
No — the game gives you starting money to buy your first parts, and the income your placed parts earn funds everything after that.
How do I stop my course from getting stuck or broken?
Run through the whole course yourself after placing every new section. Look for spots where the character clips into a part, falls through the floor, or hits something invisible, then return to build mode and fix those spots before moving on.
Game updates can change what is on this page. If you spot something, get in touch and let us know.